Stickers can let people’s creativity reflect in a pattern. Usually, people buy stickers that have been made by stores. Today we are going to learn how to make high-quality custom stickers at home! The process of making homemade stickers is very simple and the materials are easy to find. You may have a homemade sticker’s material at home. You can also buy the self-adhesive paper from an office supply store to make high-quality stickers. Learn how to make stickers with homemade glue.
Step 1: Design the Sticker
Making your own stickers means you can be creative with your designs. Use tools you want to use, such as crayons, markers, pastels, etc., to create a sticker pattern on a thin piece of paper. A loose-leaf paper or notebook paper is available. When thinking about stickers, consider the following creative options:
Draw a self-portrait or a portrait of a friend or pet.
Cut out your favorite pictures and words from magazines and newspapers.
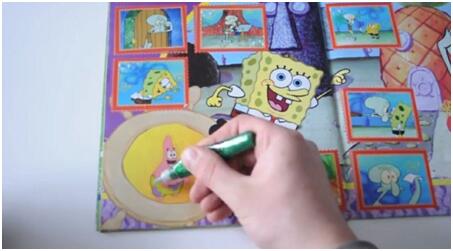
You can find your favorite cartoon characters or scenery photos on the Internet and save them to your computer, and then print them out.
For best results, print them on thin printer paper instead of photo paper.
Step 2: Cut Out the Sticker You Designed.
Use scissors or a punch to cut out pictures you have drawn or printed. You can choose the size of the sticker to suit your preferences.

Step 3: Make Glue.
Glue is the adhesive that attaches stickers to most surfaces. So, glue is the most important factor in determining whether your sticker will be successful or not.
Pour the following ingredients into a bowl and mix well:
One pack of gelled gelatin (equivalent to 7.2 g or 1 tablespoon)
Four tablespoons boiling water
One teaspoon sugar or corn syrup
A few drops of peppermint or vanilla extract (for flavor)

Step 4: Apply the Glue to the Sticker.
Put the front side of the sticker upside down on wax paper or aluminum foil. Use a paintbrush or small brush to lightly apply glue to the back of the sticker. After all steps are completed, let the glue dry completely.
It is important to note that you do not need to dip the entire sticker in the adhesive, just apply a light layer of glue and the sticker must be completely air-dried before use.
Step 5: The Last Step is to Lick the Sticker (or put spit on the back of the sticker).
When you’re ready to stick the sticker somewhere, just lick it like a postage stamp and press it down on the surface for a moment. Homemade glue is very sticky, and homemade stickers are easy to break, so you should stick them where you want to stick them all at once. Your high-quality custom stickers are ready to use.
Ways to Make Your Own Stickers Updated.
Last time we introduced homemade glue stickers. Today we will introduce how to make self-adhesive stickers. Last time the most important thing for our glue stickers was glue. The most important thing for making stickers today is to choose the materials. This time our sticker has requirements for sticker materials, and what we need is self-adhesive paper. Self-adhesive stickers do not need as many materials as glue stickers, but the quality is better than glue stickers. Compared with glue stickers, it can be slightly waterproof, with clear pattern printing and no fading.
How to make self-adhesive stickers
Buy Adhesive Paper
There are some papers with adhesive on the one side available in the market. When you want to paste paper, you can tear off the backing paper on the adhesive paper and apply it to somewhere you like.
Draw the Design of Your Stickers
Use Adobe Photoshop, Paint, or other Paint programs on your computer to create a sticker pattern. Anything you want can be designed into patterns. You want your family photos on the stickers, that’s ok; you want to hand draw the design, that’s cool.
And then you can send the design into your computer and print the pattern on the self-adhesive paper.
Pro tip:
If you decide to paint on a piece of self-adhesive paper by yourself, remember do not make the paper too wet, or you may find it is not easy to make the design visible on the adhesive paper.
Remove the Extra Part of Your Design with Scissors
If you want circle stickers, you can cut the design of your stickers into a circle. First, draw the simple circle shape around your pattern and then using scissors to trammel the extra paper.
If you want custom die cut stickers, you can also use scissors to cut into shapes.
Tear Off the Backing Paper.
Finally, you can use your stickers! It is exciting and rather easy. Just peel off the protective paper on the backside of the adhesive paper and then you can stick them wherever you see fit.
The above content is a very simple method of making your own stickers. Teachers and parents can learn this method to let children give full play to their creativity and imagination.
In addition to the two methods described above, the simplest method is to make stickers with box sealing tape.
How to make stickers with packing tape
Step One:
Cut out magazine prints or paint your own
In this method, you use patterns that have been printed with waterproof ink as templates.
You can use glossy magazine or book designs, and then use scissors to cut out the patterns and text you like. Note that you can use any design, the only limit is that the width of each sticker must match the width of the tape used to seal the box.
Step Two:
Add tape to the sticker
The tape is used as adhesive here. Cover the entire sticker with a box sealing tape. Then press the tape onto the front side of stickers. It has to be a one-time thing because any rearrangement of the tape can cause damage to the sticker.
Pro tip: If the sticker pattern is too large for one piece of tape to completely cover it, you can use two. But when the sticker is finished, there will be visible seams where the two pieces of tape meet.
Step Three:
Rub the front of the sticker.
In order to further fuse the tape and the sticker, remember rubbing the front of the sticker with whether your hand or anything hard.
Step Four:
Rinse the sticker with warm water
Place the sticker under the tap with the paper facing the water and rinse one sticker at a time until the paper and tape are separated.
The purpose is to wash away the paper and leave the ink on the tape. The key is to wet the entire sticker.
Step Five:
Dry the sticker
After removing the paper, allow the sticker to dry thoroughly, allowing the adhesive to stick again. Then cut off the extra part of the sticker, and then stick the sticker to the surface of your choice.
If you want to learn more about how to make stickers at home, follow GS-JJ.com and we’ll keep the blog up to date.
The fun of homemade stickers is to enjoy the process and the results. You can use homemade stickers as a family activity. But homemade stickers are different from store-bought stickers in that they are more likely to be damaged. If you want it just for fun you can choose homemade stickers, if there are other uses, you need to buy another form of high-quality custom stickers from the store. GS-JJ Company as a professional manufacturer of stickers, they have more than 20 years of experience in manufacturer stickers. So if you want to buy some cheap and high-quality stickers, you can browse GS-JJ.com. We have all kinds of stickers. Our contact information email address is info@GS-JJ.com and the number is 188-886-44755.
Picture Source From https://zh.wikihow.com/%E5%88%B6%E4%BD%9C%E8%B4%B4%E7%BA%B8