


How to Customize Ball Markers Online?

Lea Alber
Ball markers are little accessories that resemble coins that golfers use to indicate the location of their golf ball on the green. Though a basic task, ball markers have become a popular vehicle for individual expression through personal style, brand visibility, and team pride. Many golfers enjoy custom ball markers since those items make their game a bit more unique to them, help to identify their golf gear with ease, and often provide sentimental memorabilia, as well as gifts from one-time promotional events.
With the influence and impact of digital design tools, online customization has become the primary method of creating custom ball markers. Online stores offer more reliability, expedience, and practically unlimited design options -- colors and patterns to include logos, photos, and custom text -- when it comes to ordering customized ball markers, compared to the prior ordering offline. Whether personal use, team, or corporation, ordering customized ball markers has never been easier than merely turning an idea into an online customization experience, to high-quality product, using digital design technology.
I. How to Customize Ball Marks Online?
Step 1: Find a Reputable Online Ball Marker Supplier
Identifying the correct supplier is the basis for any customization project. A reputable online manufacturer will ensure good quality product, as well as a reliable and seamless ordering process.
1. Key Considerations
● Reputation & Experience
Look for suppliers with years of experience in customized golf accessories and clear product portfolios.
● Full disclosure on pricing.
Choose suppliers offering clear pricing charts or instant online quotes—no hidden fees.
● Shipping Speed & Production Time
Fast production and reliable global shipping are essential for tournament deadlines or gift events.
● Customer Reviews
Look through reviews, ratings, and gallery photos to confirm consistent quality and service.
2. Types of Suppliers You May Find
● Professional Golf Accessory Websites
These focus on golf gear; their ball markers often include golf-specific features such as hat clip magnets.
● Promotional Products Manufacturers
Number one choice for bulk corporate orders, giveaways, and branded products.
● Custom Metalwork Factories
Offer the widest material and process customization—great for premium or highly detailed designs.
Step 2: Choose Your Marker Type
Your design experience starts by selecting which marker type you prefer, what your budget is, and the use case of the marker.
1. Metal Markers
These are popular for their durability and upscale looks.
● Soft Enamel
Bright colors with recessed enamel areas and raised metal areas.
● Hard Enamel
A smooth, jewelry-like finish that allows the color to be mixed with the metal. Excellent durability for the high-end marker.
● Stamped Metal
A simple, classic, and cost-effective option. Best case for designs that revolve around a logo.
● Laser Etched
A clean way to give a very precise marking onto a material, suitable for stainless steel or brushed metal surfaces.
2. Magnetic Balls Markers
This is a great option to use for pairing with hat clips or divot tools. Once on the green, these are easily accessible and also much more widely used in tournaments or club events.
3. Shape Options
You can choose from:
● Round - This is the most traditional and generally accepted style.
● Square - An option that is more contemporary, with a different look than the standard round option.
● Custom Die-Cut Shapes - design a completely custom or additional unique style with traditional logos, icons, mascots, or personalized for an event.
4. Size Options
Most common sizes include the following:
● 1 inch (25.4 mm) - Normal size golf marker.
● 1.25 inches (32 mm) - Good for leveraging more detailed designs, and for branding purposes for maximum visibility.
● Custom Size - based on the design complexity, and what your supplier can accommodate.
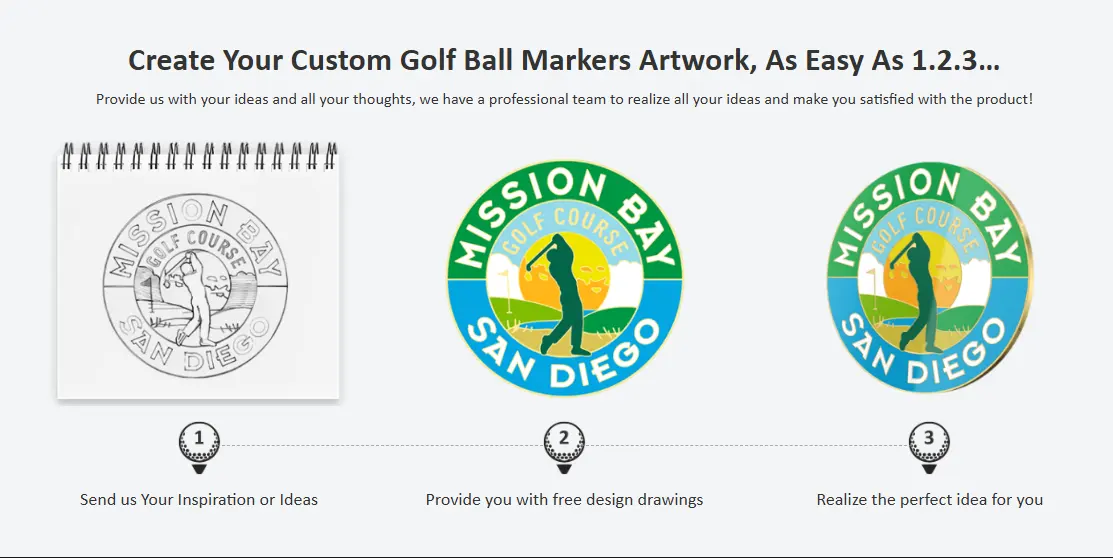
Step 3: Create Your Design Online
After you've made your selection of a supplier and ball marker style, the next step is to create your design. Most customization sites today offer easy-to-use online design tools, which will allow you to upload artwork, adjust the visual features, and essentially preview the end product immediately.
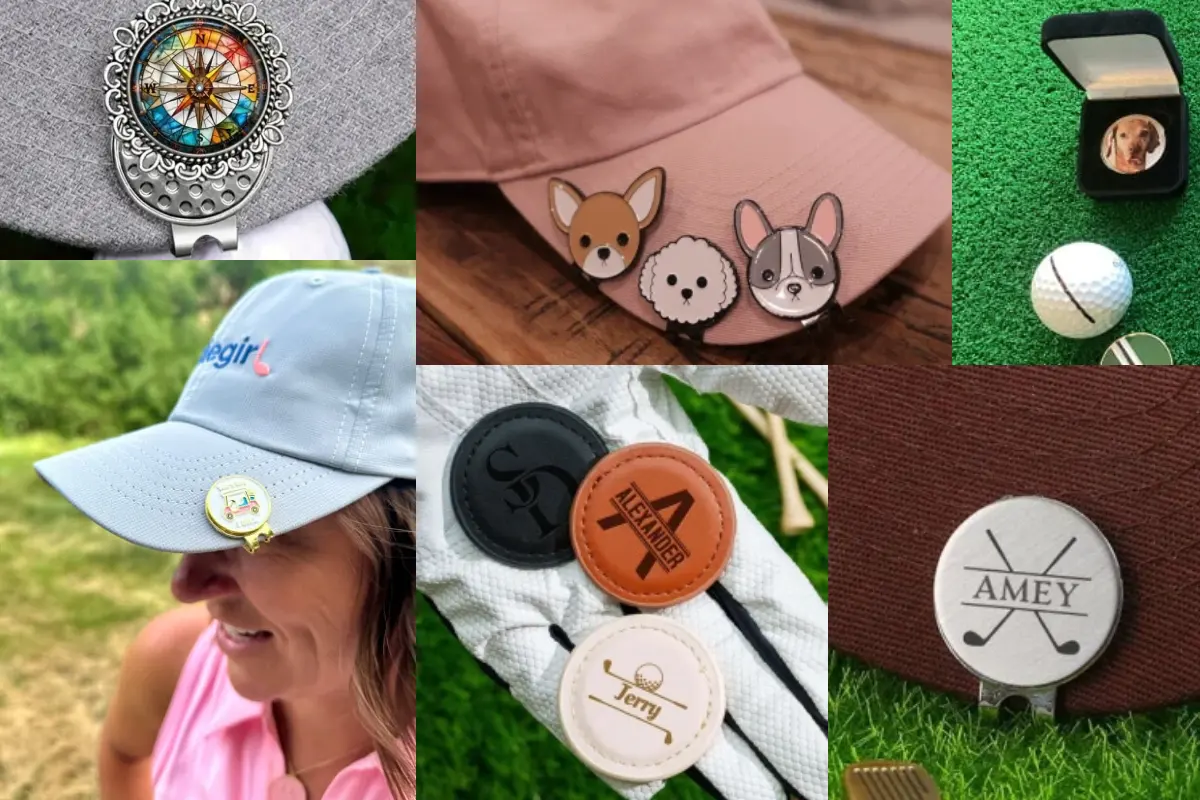
1. Upload Your Logo, Image, or Text
The first step is to upload the graphic elements you want on your ball marker:
● Company, event logos
● Personal monogram
● Team name
● Number, initials, or short motivational saying
Most online customization sites also allow for drag-and-drop upload for simplicity.
2. Use the Design Editor to Modify Your Design
Most online design studios will have a simple yet powerful design feature where you can customize your design with:
● Colors: Use full color palettes to match your brand or theme.
● Fonts: Use one of the many font styles that would be bold, classic, sporty, and elegant.
● Icons & Patterns: Use golf-related graphics or add a decorative border.
● Shapes & Layouts: Adjust the placement of the logo, rotate an element, resize logos, or switch shapes, templates.
Step 4: Choose Color, Plating, and Surface Finish Options
The look and feel of your custom ball marker will be determined primarily by your selection of plating, coloring technique, and surface finish. These components determine not only the final look of the product, but also affect in durability, texture, and quality.
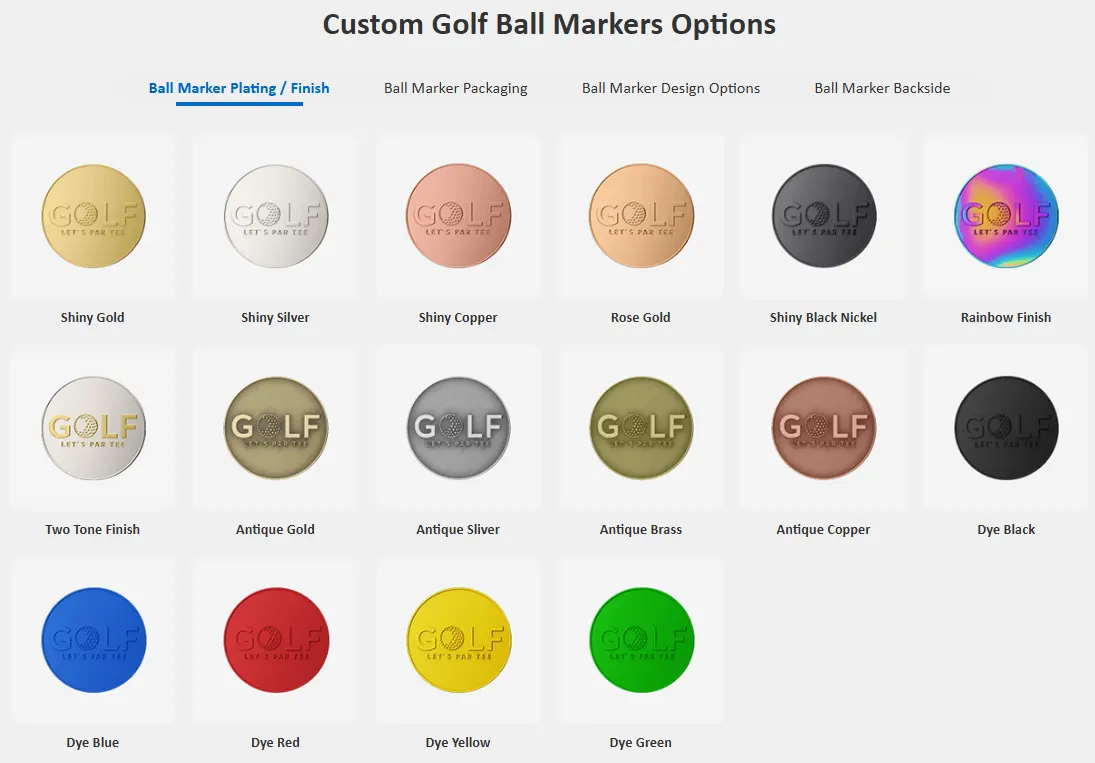
1. Plating Options
Plating determines the base metal color and overall tone of your ball marker. Common finishes include:
●Gold
It is elegant and attention-grabbing. Great for awards, tournaments, and upscale branding.
●Silver
Timeless and versatile, it provides a clean and classic design compatible with most colors.
●Black Nickel
It has a dark metallic sheen that is sleek and modern; works beautifully in designs with high contrast.
●Copper
It adds a warmth and vintage feel; attractive for markers that are rustic or have an antique style.
Choose the plating based on what shades of color are in your logo. Contrasting shades of color often provide a more clear detail against the logo text.
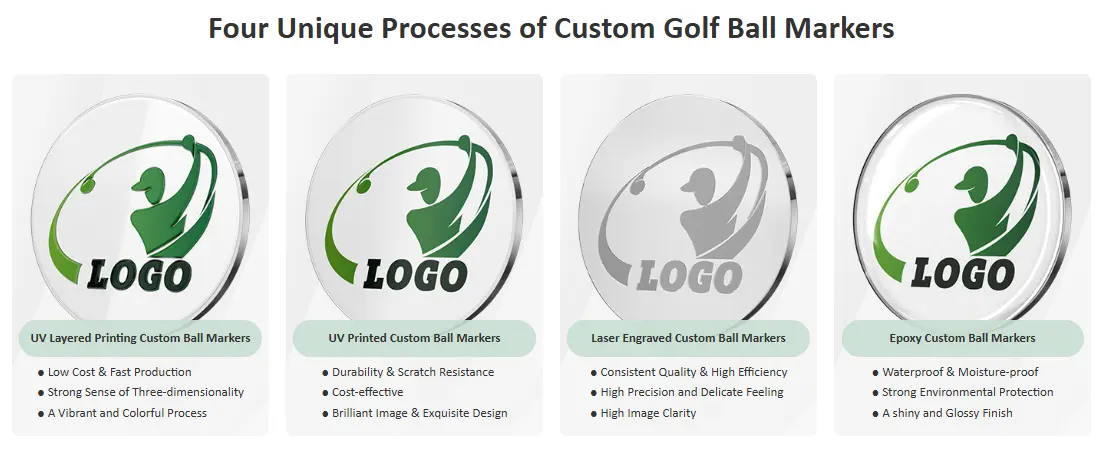
2. Color Styles
How colors are applied depends on the design process and material.
● Full-Color Printing
Best for complex images, gradients, or photographs. Offers maximum color flexibility.
● Enamel (Soft or Hard)
Sturdy and vivid. Soft enamel consists of colored recessed areas, while hard enamel is polished and smooth like a piece of jewelry.
● Epoxy Resin Coating
A clear protective dome is applied on top to create a glossy and durable finish—great for prints.
3. Surface Finishes
Surface finish affects both appearance and tactile feel—small details that greatly enhance the professional look.
● Matte Finish
Non-reflective, modern, and subtle.
● Polished Finish
Bright, mirror-like shine—great for luxury aesthetics.
● Sandblasted Finish
Fine texture that creates visual depth when paired with raised metal details.
● Textured Finish
Custom textures or patterns that add grip and uniqueness.
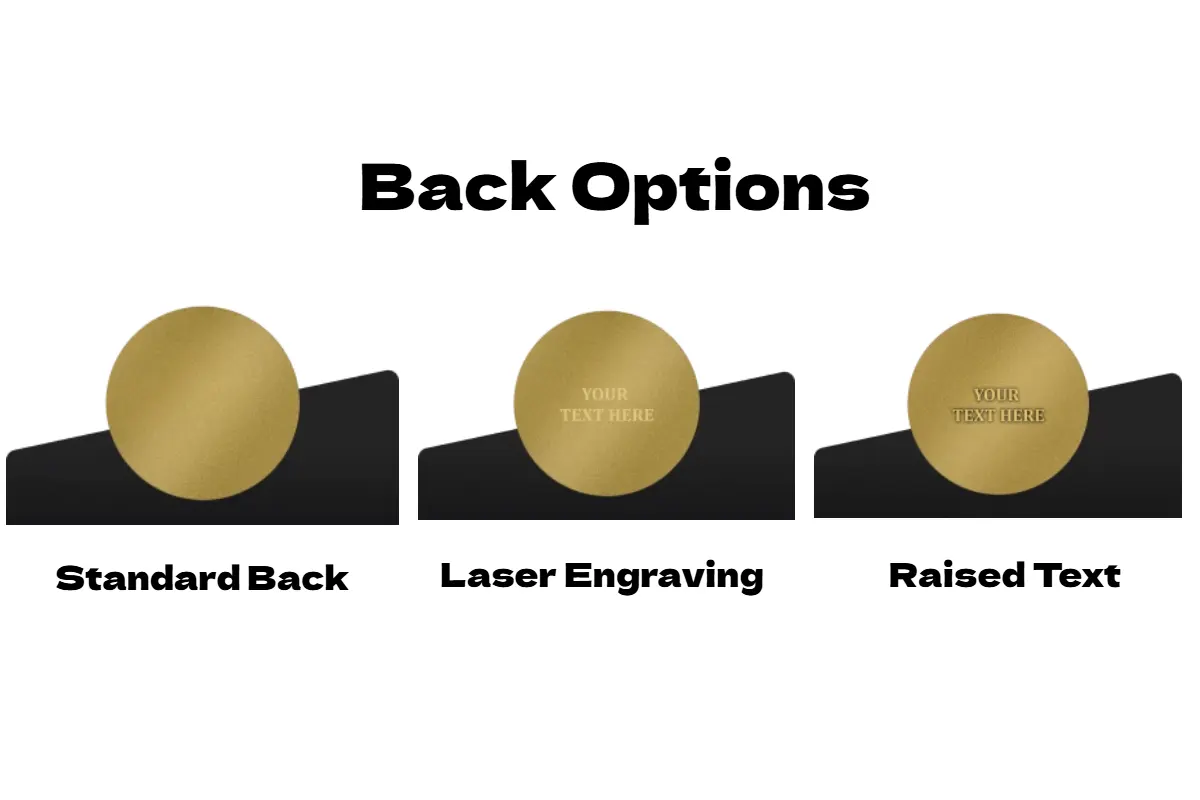
4. Back Options
The back side of your ball marker determines how it attaches to accessories:
● Magnetic Backing
Compatible with hat clips, divot tools, and magnetic holders—ideal for convenience on the green.
● Non-Magnetic Flat Back
Simple and affordable; great for basic markers or gift sets.
● Cap Clip Available
Some suppliers allow you to add a matching hat clip to create a complete accessory set.
Step 5: Review the Electronic Proof
Your custom ball marker will enter production once you have received an electronic proof from the supplier, which is a critical step in verifying the final product will be what you expect.
What to Pay Close Attention To:
● Color
Check to ensure colors meet your brand or design specifications. If you supplied Pantone codes, ensure they are all correctly labeled.
● Alignment and Layout
Check all logos, icons, and text are both centered or positioned to your liking.
● Spacing and Proportions
Examine borders, outlines, and spacing and check that it looks balanced and is not too busy.
● Shape Outline
Check the final shape of the die-cut, especially if you are having a custom silhouette or shape created.
● Legibility of Text
Review wording and small text to ensure it is legible and not overly thin on metal or enamel surfaces.
● Free Revisions Prior to Final Approval
By now, the majority of reputable vendors will provide no-cost modifications. If there is anything that is not quite right - the tint of a color, the form or dimension, the position of text, etc. - point it out at this time, prior to giving your final consent. It may happen that you will not be able to make alterations once you have accepted the proof and have granted production.
Step 6: Place Your Order and Wait for Production
1. Minimum Order Quantities
Suppliers have different MOQs based on the marker type and complexity of the personalization:
● Metal markers (enamel, stamped, engravings) generally have higher MOQs due to tooling and production setup.
● Printed markers or less complex personalization or design may have smaller MOQs, which could work out great for personal gifts or small events.
Be sure to check your suppliers MOQ before completing your order so you are not surprised by something you didn’t expect to see.
2. Production Timelines
Production speed varies based on marker style and process:
● Metal markers with enamel, engraving, or plating may take 7–14 days or longer.
● Printed or simpler markers are typically faster, often 3–7 days.
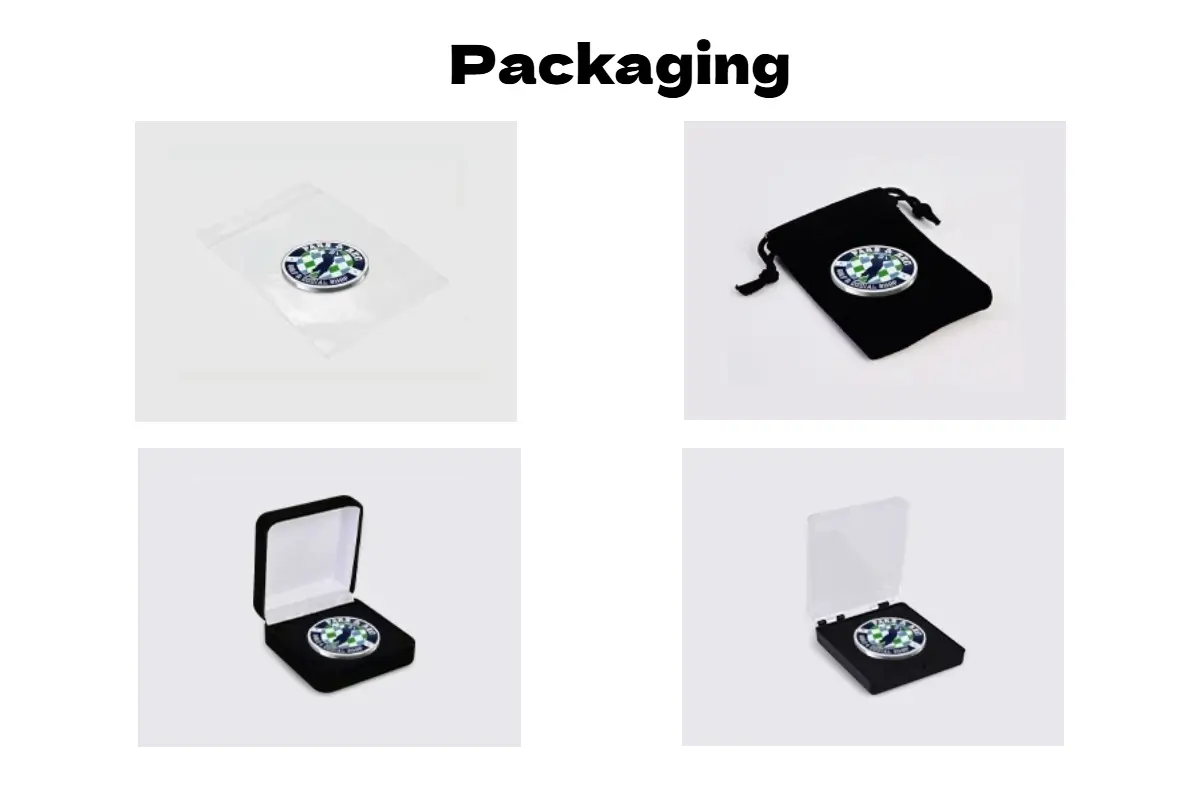
3. Shipping and Packaging
Many suppliers offer standard or express shipping options. Custom packaging (gift boxes, pouches, or sets with hat clips) may be available, adding professionalism and gifting appeal.
II. Guidelines for Designing Custom Ball Markers
To create an effective functional ball marker with a good custom design, you will want to make some thoughtful decisions. Here are some professional suggestions to help you put your badge in play that looks good on the green:
1. Keep Small Details Bold and Simple
Small badges do not work well with fine lines or intricate detail. Use bold shapes, distinct outlines and simple graphics when creating a ball badge to maintain clarity.
2. Choose Colors With High Contrast
Choose colors that attract attention and combine contrasting colors, such as dark text on a light background or bright colors on a metallic marker, so out the field it is easy to see while in play.
3. Select the Style Appropriate For Event or Brand
Think about what the badge is for and the overall look and feel. For a corporate event, maintain brand colors and logo. For a tournament, consider using golf-themed icons on the magnet. For general gifts, either a playful style is appropriate.
4. Ensure Readability At Actual Size
You should always review your ball marker mock-up at actual size to check that any text, numbers, or small icons are still clearly identifiable.
5. Keep in Mind Design Approach And Function
A creative and innovative design style is fun and will certainly catch players’ attention; you just want to ensure the ball marker is easy to use or does not disrupt gameplay.
III. Conclusion
Custom ball markers are not only great aids on the golf green for personal use, corporate gatherings, or golf tournaments, but they also create memorable souvenirs you can use that express your personality. Start a design today and experience the delight of having your own custom golf item.