



Have you ever wondered how this heavy, textured challenge coin in your hand is made? Transforming a creative sketch into an exquisite metal souvenir requires a perfect combination of industrial precision and handcraftsmanship. Whether you plan to customize Challenge Coins for military recognition, corporate awards, or event promotion, understanding the complete production process can help you optimize your design and make it more suitable for actual production.
How are challenge coins made?
Coins
Guide

Adeel Qayum
September 18, 2026
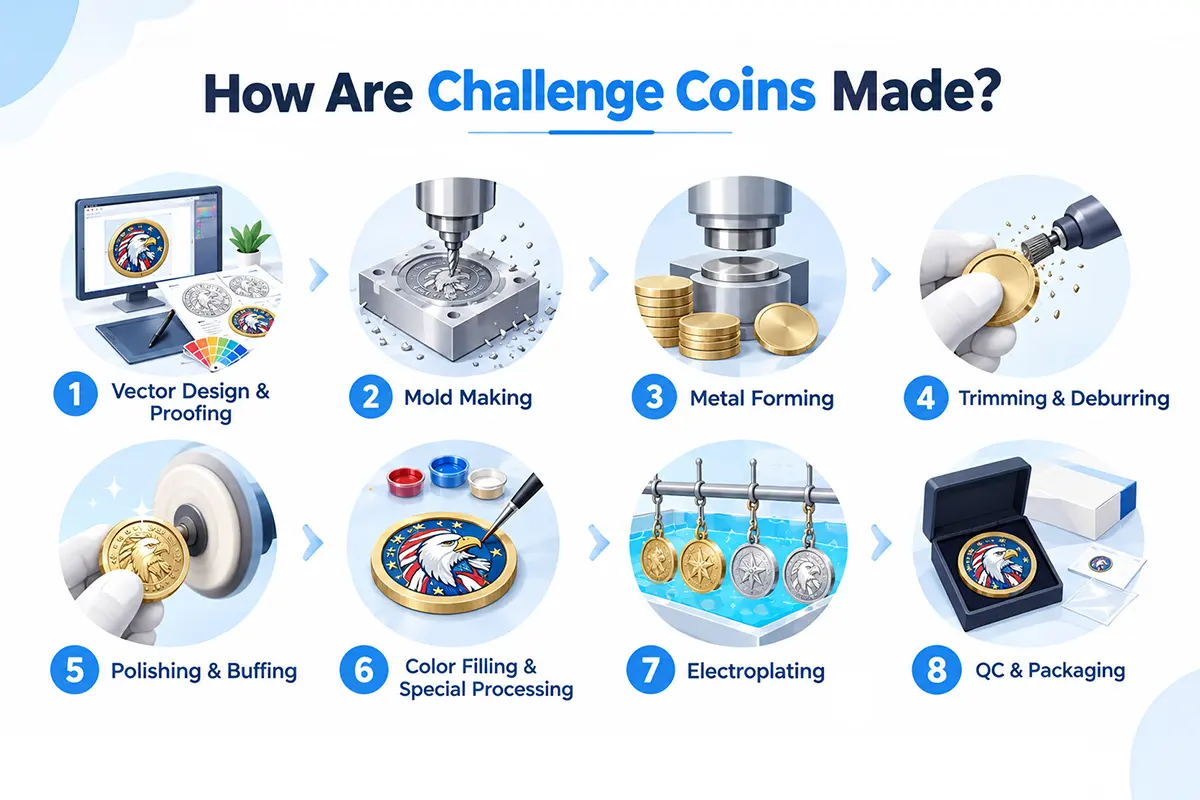
I. How to make challenge coins?
Curious about how coins achieve a weightier, more substantial feel compared to standard pins? While they share some basic manufacturing techniques, coin minting involves a more intensive manufacturing process. If you would like to learn the specifics of pin manufacturing, please consult our guide to custom enamel pin production. Below, let's follow along to discover the complete 8-step minting process.
Step 1: Vector Design & Proofing
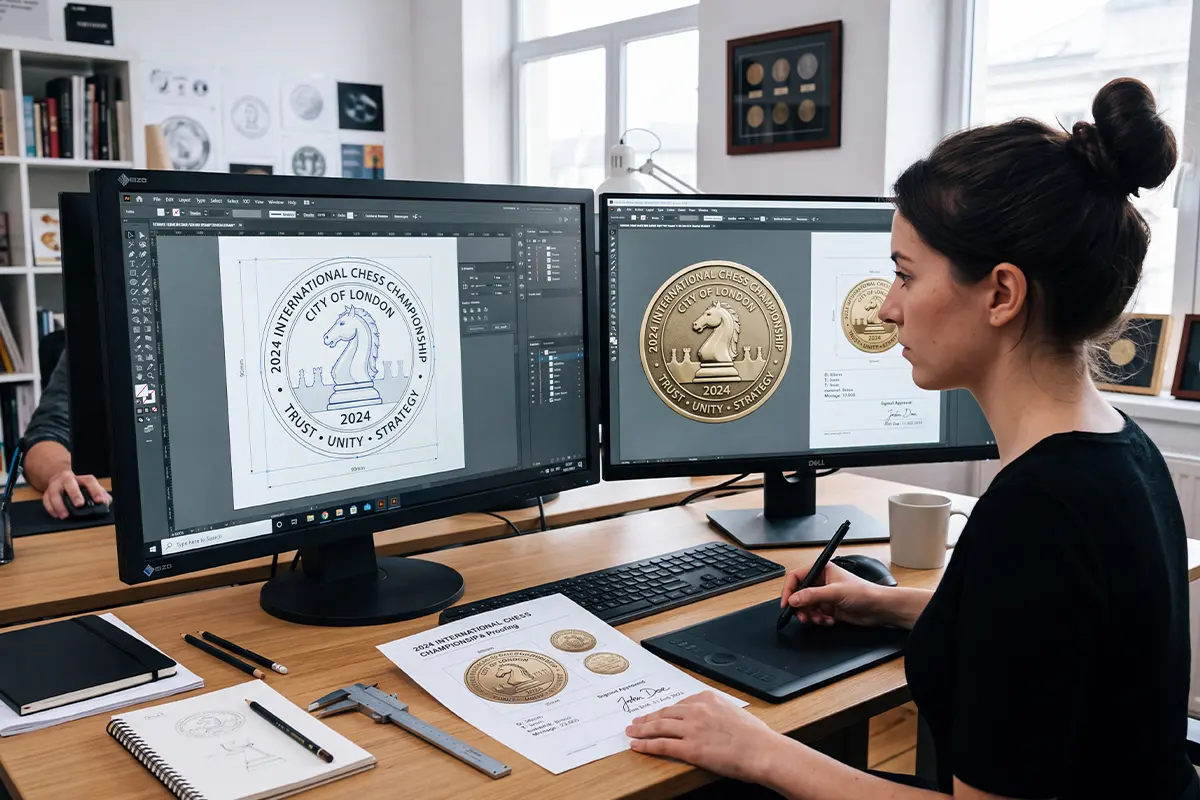
Convert the client's design drafts into high-precision 2D or 3D vector production drawings, clearly specifying Pantone color codes and raised metal textures. In this step, all the core parameters of the commemorative coin must be determined:
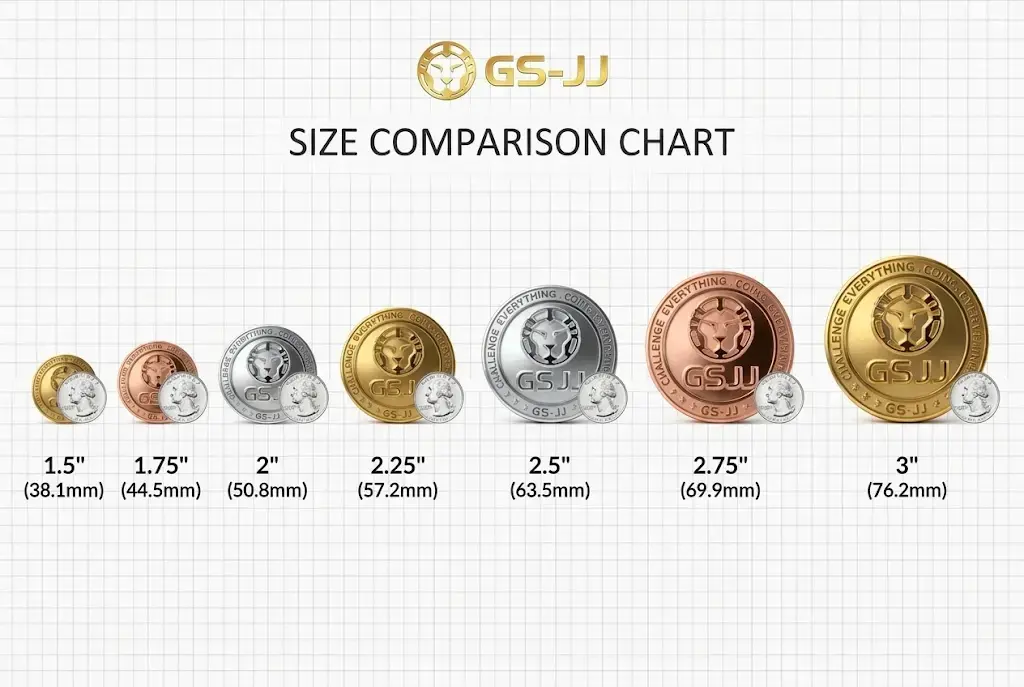
● Size: Common sizes range from 1.5 inches, 1.75 inches, and 2 inches up to 3 inches; custom shapes and sizes are also available upon request. If you are unsure which size best suits your design, please refer to the GS-JJ challenge coin size guide.
● Thickness: The standard thickness generally ranges from 3.0 mm to 4.0 mm; for coins featuring deep 3D relief or an integrated bottle opener, the thickness can be increased to 4.5 mm–5.0 mm or more.
● Dual-Sided Alignment: Unlike single-sided pins, challenge coins require precise alignment of the obverse and reverse designs and 360-degree planning of the perimeter to ensure the distinctive edge pattern complements the overall design.
● Size: Common sizes range from 1.5 inches, 1.75 inches, and 2 inches up to 3 inches; custom shapes and sizes are also available upon request. If you are unsure which size best suits your design, please refer to the GS-JJ challenge coin size guide.
● Thickness: The standard thickness generally ranges from 3.0 mm to 4.0 mm; for coins featuring deep 3D relief or an integrated bottle opener, the thickness can be increased to 4.5 mm–5.0 mm or more.
● Dual-Sided Alignment: Unlike single-sided pins, challenge coins require precise alignment of the obverse and reverse designs and 360-degree planning of the perimeter to ensure the distinctive edge pattern complements the overall design.
Step 2: Mold Making
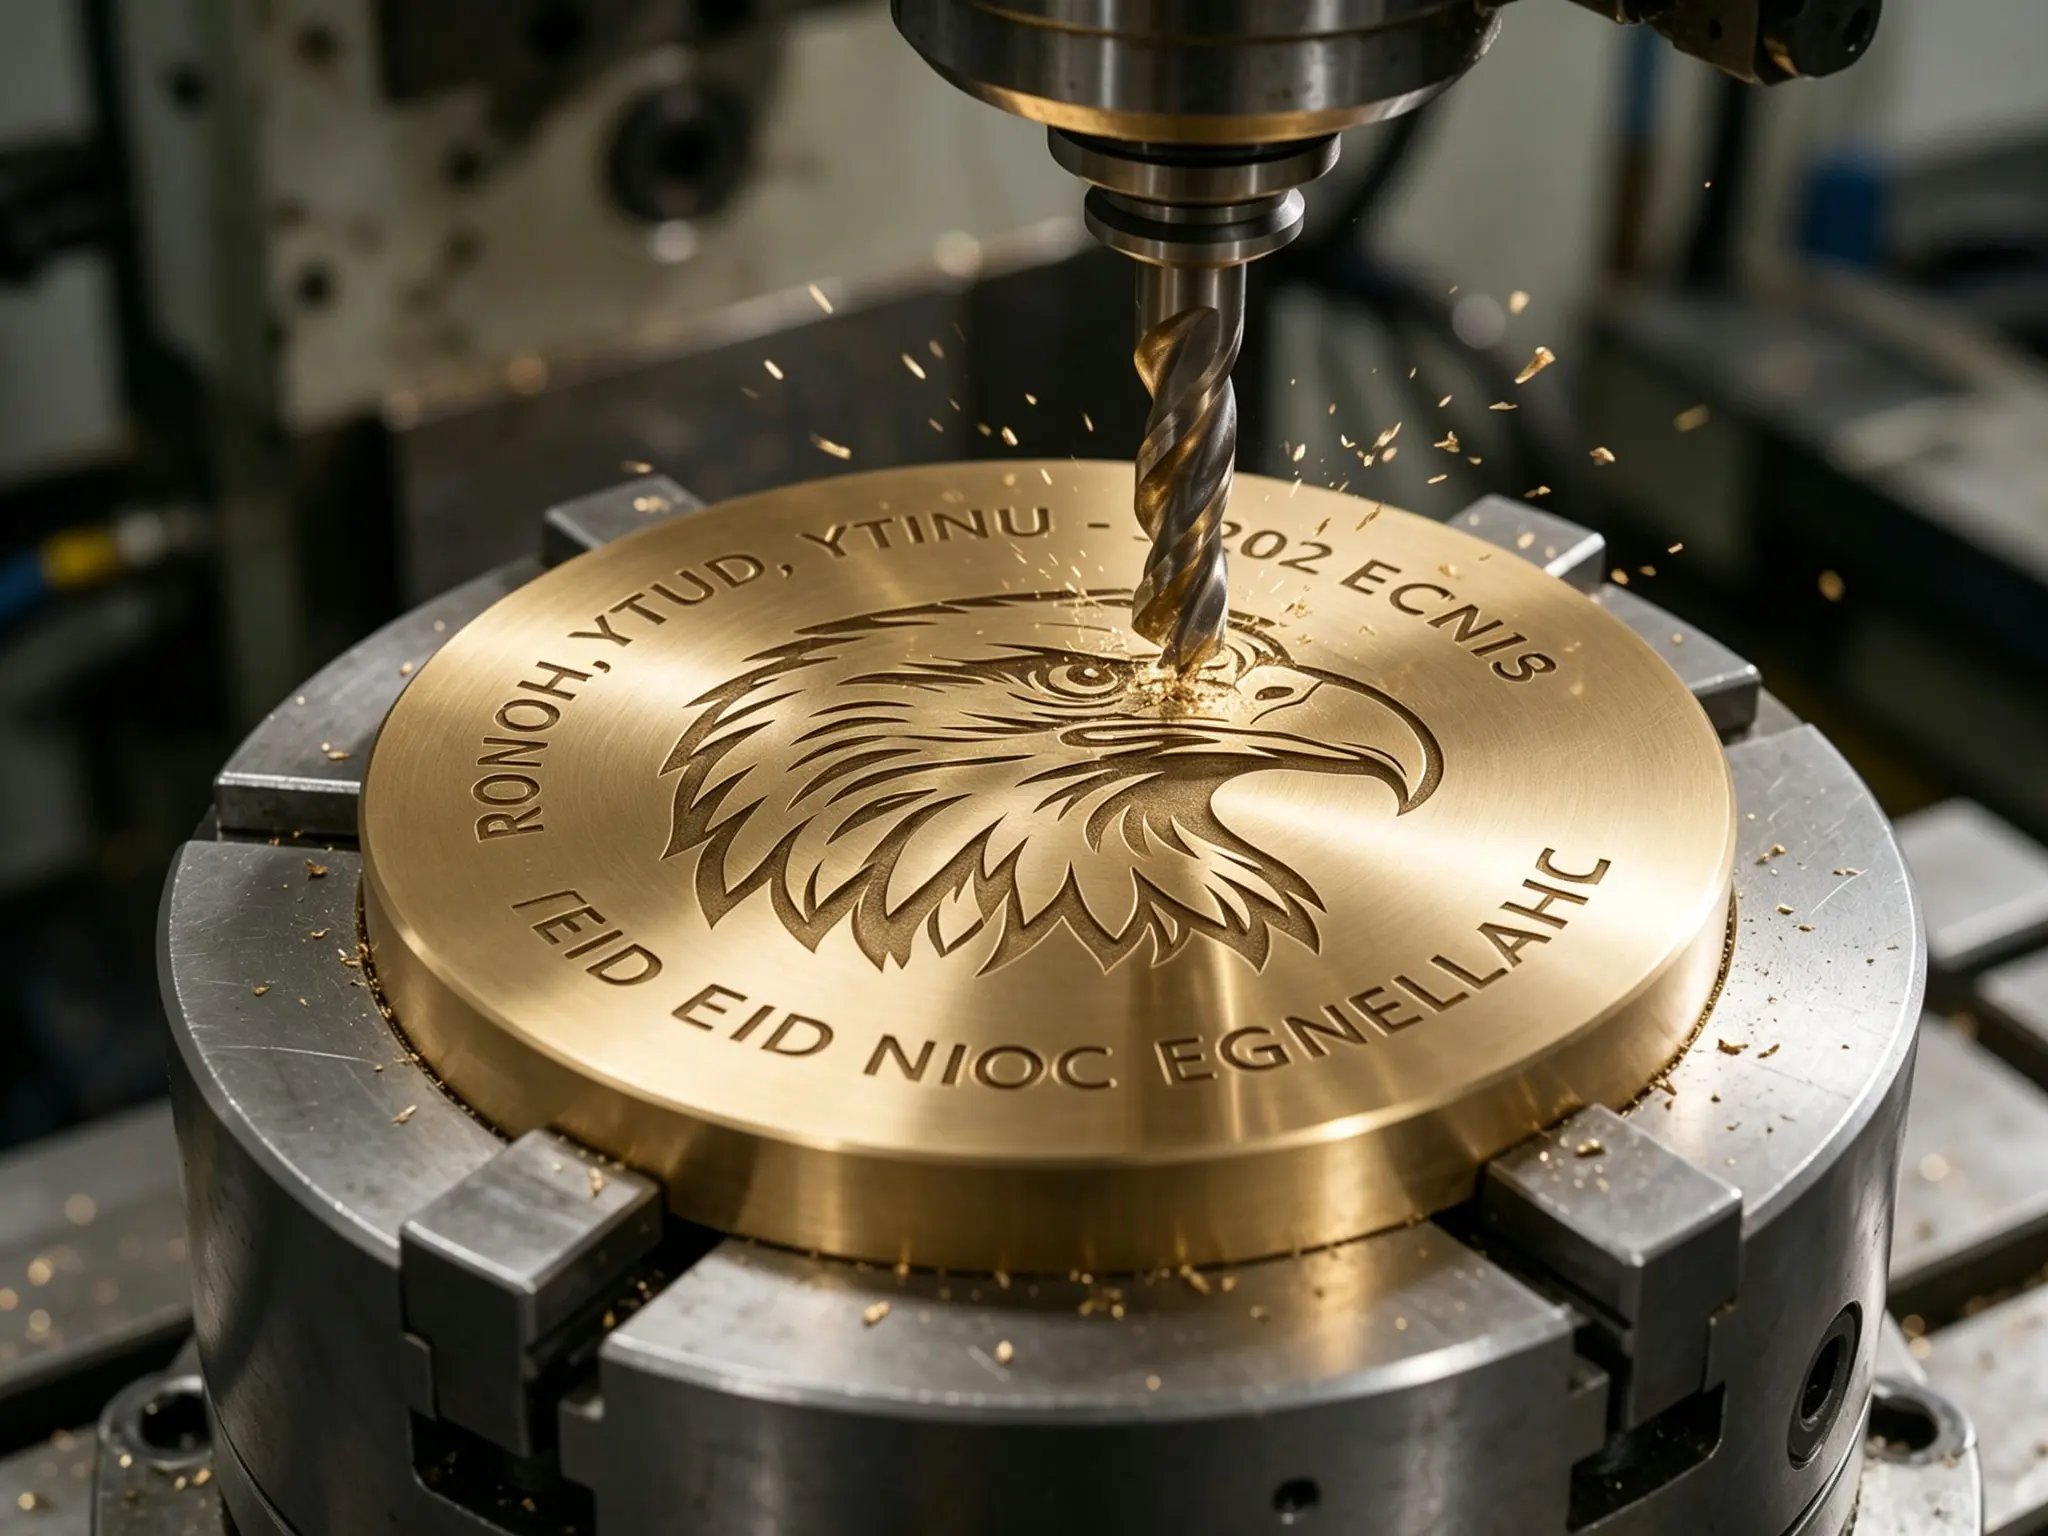
● Process flow: Using a high-precision CNC machine tool, a negative mold is carved on special mold steel, precisely giving life to every line and curve. Then, it enters a high-temperature heat treatment and oil quenching, so that its hardness reaches the standard of withstanding hundreds of tons of stamping or high-pressure die casting.
● Mold edge preparation: Decorative borders that are integrated into the main coin face (such as rope edge, chain edge, grid edge) are directly engraved in the steel mold at this stage so that they can be struck simultaneously with the main pattern during forming.
● Mold edge preparation: Decorative borders that are integrated into the main coin face (such as rope edge, chain edge, grid edge) are directly engraved in the steel mold at this stage so that they can be struck simultaneously with the main pattern during forming.
Step 3: Metal Forming
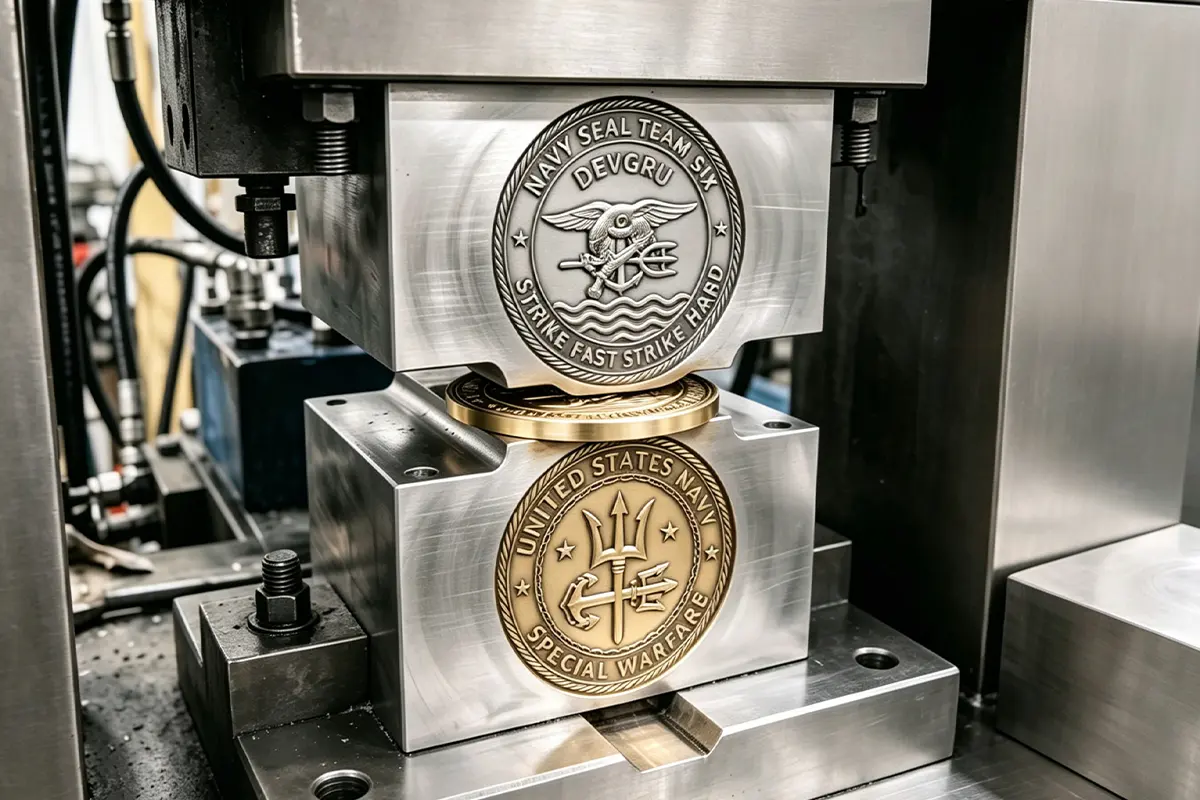
This process establishes the overall structure and dense, solid feel of the coin body—an effect that standard pins cannot achieve. Select the most suitable forming process based on the coin's structural design:
Molding Process
Suitable Materials
Features and Applications
Die Striking
Brass, copper, iron
Formed by stamping in a heavy-duty hydraulic press (300 to 1,000 tons), this process yields high metal density and intricate detailing, serving as the core technique for crafting classic custom brass coins.
Die Casting
Zinc Alloy
Molten metal is injected into the mold under high pressure. Ideal for complex coin designs featuring cutouts, custom contours, or integrated bottle openers
Step 4: Trimming & Deburring
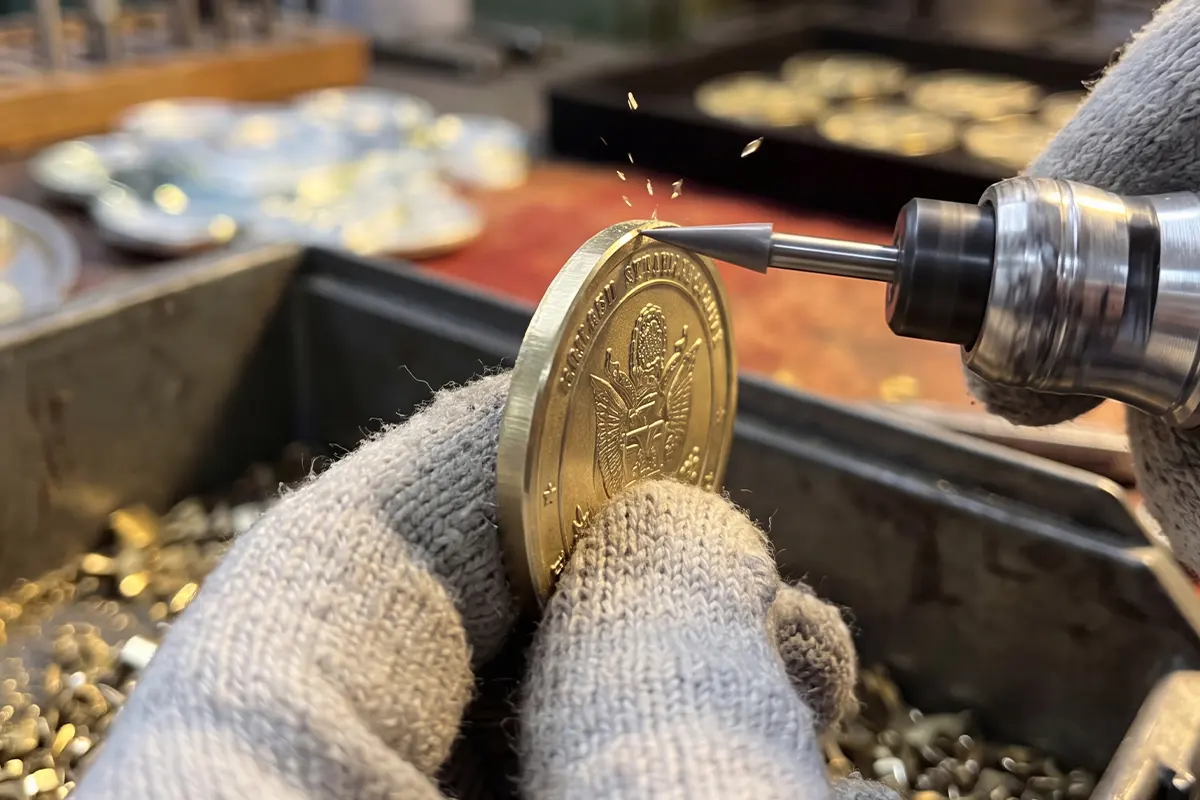
● Process flow: After the excess metal edges are removed via a punch press, the parts are placed in a barrel tumbler and polished with abrasive media to completely eliminate tiny burrs from the metal surface.
● Secondary Diamond-Cut Edging: Unlike pins that require soldering attachments to the back, challenge coins do not need rear fittings; instead, the focus is on edge finishing. While the basic edge pattern is formed during the initial stamping stage (Step 3), specialized styles such as diamond-cut edges (including cross-cut, spur, and sunburst patterns) are created in this step using high-speed precision lathes. For a two-tone contrast effect, some diamond edges are trimmed after electroplating to expose the warm-toned brass base. If you are unsure which edge style best complements your design, please consult our "Coin Edge Style Guide" to compare options and receive recommendations.
● Secondary Diamond-Cut Edging: Unlike pins that require soldering attachments to the back, challenge coins do not need rear fittings; instead, the focus is on edge finishing. While the basic edge pattern is formed during the initial stamping stage (Step 3), specialized styles such as diamond-cut edges (including cross-cut, spur, and sunburst patterns) are created in this step using high-speed precision lathes. For a two-tone contrast effect, some diamond edges are trimmed after electroplating to expose the warm-toned brass base. If you are unsure which edge style best complements your design, please consult our "Coin Edge Style Guide" to compare options and receive recommendations.
Step 5: Polishing & Buffing
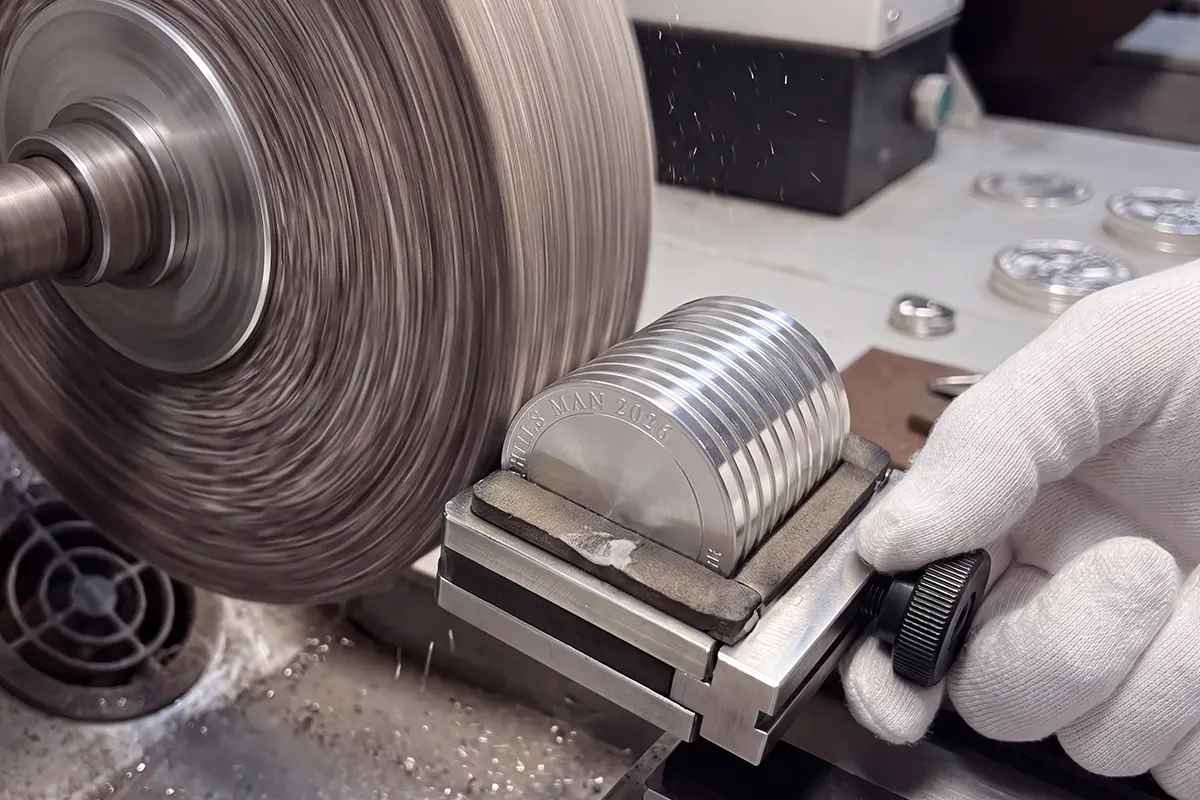
● Process flow: After vibratory grinding removes the microscopic rough layer, experienced artisans take over; using micro-grinders and high-speed buffing wheels paired with polishing paste, they manually precision-polish the coin's irregularly shaped edges as well as its obverse and reverse sides to achieve a mirror-like finish.
● 360-degree surface polishing: Ordinary pins are typically only polished on the front side. Challenge coins are different; the front, the back, and the thick metal rim must all be meticulously polished to achieve a mirror-like finish.
● 360-degree surface polishing: Ordinary pins are typically only polished on the front side. Challenge coins are different; the front, the back, and the thick metal rim must all be meticulously polished to achieve a mirror-like finish.
Step 6: Color Application & Enamel Curing
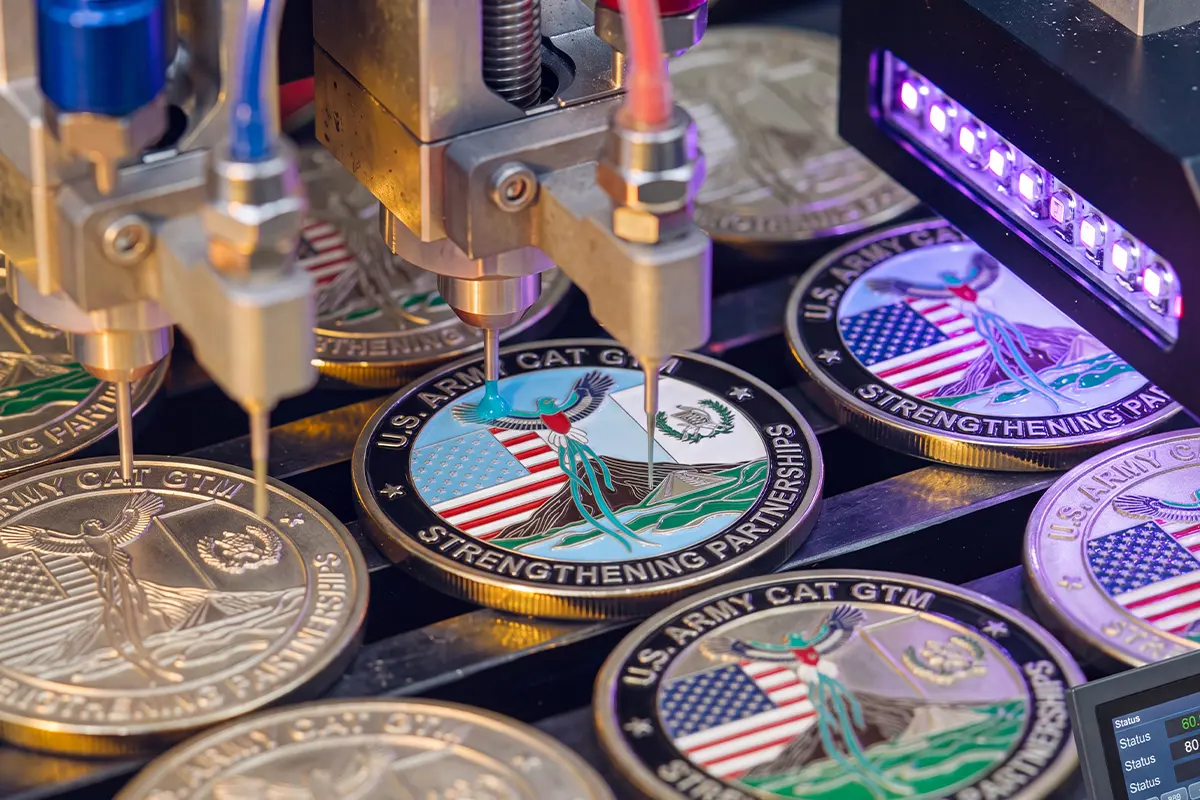
Depending on the selected process type, the coloring process follows different process sequences. Compared to standard pins that feature single-sided coloring, challenge coins possess larger surface areas and recessed areas on both sides; this necessitates greater precision regarding depth control and the flatness of the enamel finish:
● Hard Enamel: Enamel paste is filled into recessed metal areas and cured by baking at high temperatures. Artisans then grind and polish the surface so that the enamel sits flush with the raised metal edges. Hard enamel challenge coins undergo filling and leveling prior to electroplating; this ensures the exposed metal lines receive a complete plating layer, free from damage caused by the grinding process.
● Soft Enamel and UV Printing: These processes take place after the electroplating stage (Step 7). Liquid enamel is poured into the electroplated metal cavities and then placed in a low-temperature oven to cure; UV digital printing, on the other hand, directly prints complex gradient patterns on the electroplated substrate.
● Hard Enamel: Enamel paste is filled into recessed metal areas and cured by baking at high temperatures. Artisans then grind and polish the surface so that the enamel sits flush with the raised metal edges. Hard enamel challenge coins undergo filling and leveling prior to electroplating; this ensures the exposed metal lines receive a complete plating layer, free from damage caused by the grinding process.
● Soft Enamel and UV Printing: These processes take place after the electroplating stage (Step 7). Liquid enamel is poured into the electroplated metal cavities and then placed in a low-temperature oven to cure; UV digital printing, on the other hand, directly prints complex gradient patterns on the electroplated substrate.
Step 7: Electroplating
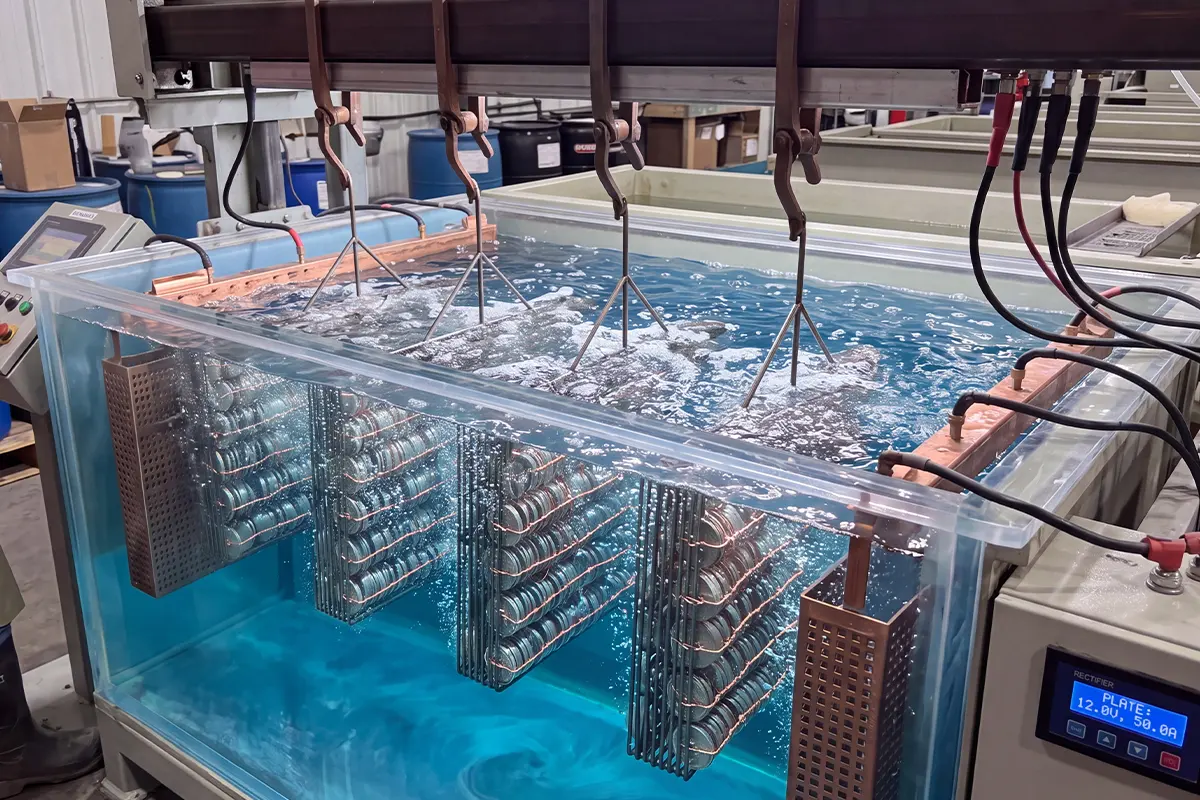
The coin blank is placed in an electroplating bath, where electrolysis deposits a wear-resistant metal protective layer onto its surface. While standard badges typically feature only a single layer of plating, challenge coins—being larger and featuring deeper relief—often undergo antiqued polishing and dual-layer plating processes to accentuate the depth and interplay of light and shadow in the relief design.
● Classic High-Gloss Finish: Shiny Gold, Shiny Silver, Shiny Copper, Black Nickel, Black Dye.
● Vintage Texture Finish: Antique Gold, Antique Silver, Antique Bronze, Antique Copper.
● Premium Specialty Finish: Dual Plating, Rainbow Finish.
● Special edge and surface details: laser-engraved edges, engraved sequential serial numbers (e.g., No. 001 – No. 500), and infills using luminous or translucent paint.
● Classic High-Gloss Finish: Shiny Gold, Shiny Silver, Shiny Copper, Black Nickel, Black Dye.
● Vintage Texture Finish: Antique Gold, Antique Silver, Antique Bronze, Antique Copper.
● Premium Specialty Finish: Dual Plating, Rainbow Finish.
● Special edge and surface details: laser-engraved edges, engraved sequential serial numbers (e.g., No. 001 – No. 500), and infills using luminous or translucent paint.
Step 8: QC & Packaging
● Assembly: Multi-part designs (such as center-spinning coins) are precisely assembled in the final stage using built-in bearings.
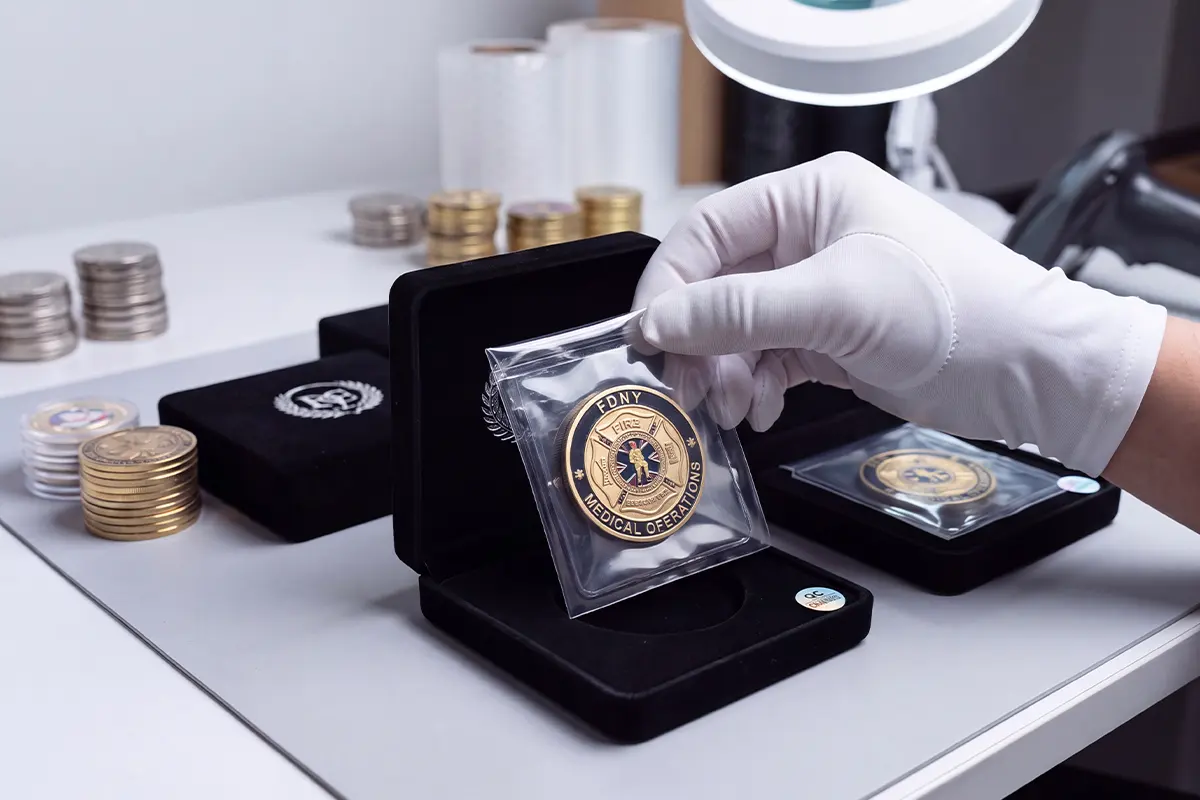
● Quality Assurance: Quality inspectors wear clean white gloves, use digital calipers to check product thickness tolerances, complete ultrasonic cleaning, and carefully inspect the surface condition with the help of magnification equipment.
● Packaging: Coins that pass inspection are sealed in protective PVC bags, transparent acrylic cases, velvet drawstring pouches, or velvet gift boxes.To ensure your keepsakes remain in pristine condition, consult our guide on how to display and maintain coins.
● Quality Assurance: Quality inspectors wear clean white gloves, use digital calipers to check product thickness tolerances, complete ultrasonic cleaning, and carefully inspect the surface condition with the help of magnification equipment.
● Packaging: Coins that pass inspection are sealed in protective PVC bags, transparent acrylic cases, velvet drawstring pouches, or velvet gift boxes.To ensure your keepsakes remain in pristine condition, consult our guide on how to display and maintain coins.
II. Why choose GS-JJ to make a coin?

1. Seamless AI Design & Real-Time 3D Proofing
Features built-in AI generation, Photoshop-style layer management, and a vast library of free templates (including styles like spinning coins and bottle openers), alongside professional 2D proofing and photorealistic 3D rendering. It supports unlimited modifications until it is perfect; even beginners can preview the details of the finished product before production.
2. Get an Instant Transparent Quote in 30 Seconds
Customers can receive a quote within 30 seconds by simply selecting parameters such as size, quantity, electroplating process, edge style, and packaging method on the online quotation system. All cost items are clearly displayed, with no hidden fees.
3. Factory-Direct Pricing & Major Brand Backing
GS-JJ operates its own factory, eliminating middlemen. It has established itself as a trusted custom supplier, serving globally renowned enterprises and organizations such as NASA, TikTok, Honeywell, Walmart, and Hitachi.
4. Global shipping
Perfectly suited to the customized needs of law enforcement and military agencies, it not only supports global shipping but also allows easy delivery to any APO/FPO/DPO military address.
5. 4.9-star rating and customer trust
GS-JJ has served over 300,000 customers and received over 60,000 genuine reviews. It boasts a 4.9-star rating on Google (out of 5), with 95% of customers giving us a five-star rating for our fast service.
Frequently Asked Questions
Do you provide samples or photos of the actual product for verification before production begins?
Is there a mold fee for the initial order? How long can my coin mold be preserved?
Do you offer eco-friendly plating options?
III. Conclusion
Now that you understand how to make challenge coins and the advantages of GS-JJ’s custom services, are you ready to create your own unique coin? If you're still unsure where to begin, feel free to read the GS-JJ official guide, "How to Customize Challenge Coins," which will guide you step-by-step to get started easily. Share your ideas, and we'll take care of the rest, working together to turn your inspiration into high-quality artwork!
Latest Blog Posts
Featuring Designs, News & Information About
Custom Challenge Coins
Custom Challenge Coins
The History and Meaning of Custom Military Challenge Coins
How to Choose Sizes for Custom Challenge Coins
